Transforming your home with DIY wall painting can dramatically alter your space, adding personality, depth, and visual appeal. It’s a fantastic way to refresh your walls without a huge budget or contractor fees. While the idea of painting your walls yourself might seem daunting, mastering the art of DIY wall painting is surprisingly achievable with the right approach and these expert tips! This guide will break down the entire process, from preparation to achieving professional outcomes. We’ll tackle various techniques, ensuring you can transform any wall into a stunning work of art. Get ready to delve into the details, discover hidden tricks, and finally achieve that professional look in the comfort of your home! We’ll explore essential preparation steps, painting techniques, choosing the right paint, and addressing potential pitfalls. This complete guide will equip you to paint your walls with confidence and achieve outcomes that will wow your friends and family.
Understanding the Fundamentals of DIY Wall Painting
Preparation is Key
Before picking up your paintbrushes, meticulous preparation is crucial for a achievementful DIY wall painting project. This isn’t just about masking off furniture; it’s about creating a surface primed for optimal paint absorption and a flawless finish. Proper wall preparation is essentially the foundation for any achievementful DIY wall painting project. Begin by ensuring all the surfaces to be painted are clean and complimentary from any dirt, grime, or loose paint. Use appropriate cleaning solutions and tools to ensure you’ve thoroughly removed any dust or debris. If there’s existing damage, repair it promptly by patching up cracks or holes. A smooth, even surface will give your paint job a professional finish and make the process significantly smoother.
Choosing the Right Paint
selecting the right type of paint is just as crucial as choosing the right tools. varied paints perform variedly on various surfaces and serve varied purposes. For instance, certain paints are better suited for specific rooms or surfaces. Consider factors like the level of moisture in the room, the wall’s material, and the desired finish, such as matte, satin, or glossy.
Tools for achievement
Quality tools are essential for a achievementful project. The right brushes, rollers, and other accessories make a huge difference. Choosing high-quality equipment is well worth the investment. A high-quality paintbrush will help ensure an even coating and minimize paint streaks, while a good roller can offer a smooth finish, especially for large wall areas. Don’t skimp on these tools – they’re your partners in crime for an amazing DIY project! Using the proper equipment will prevent problems like uneven color and smudges. Using the right painting tools enhances both speed and efficiency.
Mastering the Painting Techniques
Applying the Paint
Applying paint evenly is key to achieving a professional-looking outcome. For optimal outcomes, start by applying a thin, even coat of paint in a broad, horizontal direction. This ensures even coverage throughout the surface. After completing the initial coat, allow the paint to dry completely, as specified by the paint manufacturer’s instructions, before applying a second coat for an extra layer of depth and brilliance. Using the right technique is paramount to achieving that professional look! Always remember to adhere to the paint manufacturer’s instructions to avoid any potential damage or problems related to inadequate drying time or unsuitable mixing ratios.
Handling Tricky Areas
Painting tricky areas, such as corners, edges, or around windows, requires specific attention. A paintbrush is your optimal friend when painting these details. Use the brush to gently coat these edges, and then smooth any strokes or overlaps using a soft cloth for neat and clean outcomes. These steps contribute to an immaculate final product! Understanding which tools to use when and where is a key facet for any painting job.
Prep and Cleanup for a Smooth Finish
Masking and Protection
Protecting your surroundings is crucial. Cover furniture, floors, and any areas you don’t want to get paint on to avoid problems. Use masking tape to create clean lines around windows, doors, and trim, ensuring a clean and professional look. Proper masking is essential for a beautiful finish. Masking protects the edges of your surfaces. Use painter’s tape to protect items like baseboards, doors, and window frames. This will help guarantee a high-quality and error-complimentary final outcome.
Post-Painting Cleanup
Cleaning up is just as crucial as the painting process itself. Clean your brushes and rollers immediately after using them, following the paint manufacturer’s instructions for the optimal outcomes. Use a suitable paint thinner or a cleaning solution. Clean up any drips or spills, ensuring no unsightly marks are left. Proper cleaning procedures are key to a seamless transition from the painting process to the cleanup stage.
Tips and Tricks for Professional outcomes
Using the Right Paint
Using the right paint is crucial for a professional finish. The type of paint will affect the texture, smoothness, and overall look of the finished product. Choosing the right paint for your needs is essential for quality outcomes. Consider factors such as the wall’s material, the room’s environment, and your desired aesthetic when selecting your wall paint. For example, if you need a durable and moisture-resistant paint, select a paint specifically designed for high-moisture areas like kitchens or bathrooms. Using paint that is appropriate for the specific wall type ensures the longevity of your project and creates a durable finish.
Achieving a Smooth Finish
Achieving a smooth finish is crucial for any DIY project and will ensure you have a beautiful product in the end! Use your paint roller to apply the paint in smooth, overlapping strokes. Work in sections, and avoid applying too much paint at once. Consider using a paint sprayer if you’re working on larger walls, to ensure a uniform, smooth finish. Doing this minimizes any potential drips or smudges. This process contributes to achieving that professional look that everyone desires.
Maintaining the Wall’s Condition After Painting
Preventing Further Damage
Take care to prevent further damage to the wall by understanding the varied types of finishes. This helps ensure your hard work lasts! Properly preparing the walls is crucial to ensure that the wall is resistant to damage in the future and maintains its integrity. Also, consider the potential environmental impacts of the paint and the proper cleaning and disposal methods to ensure that your project is sustainable.
Protecting Your Walls from the Elements
Consider the effect of the elements on the painted surface and what you can do to help protect it. Ensuring your paint job is not affected by external forces will maintain its integrity for years to come. For example, if your walls are exposed to direct sunlight, use paints designed to resist UV degradation. This helps maintain the color and longevity of the paint job.
Budget-Friendly Options
Choosing Affordable Paints
While quality paint can enhance the project, choosing budget-friendly paints doesn’t mean sacrificing quality. Budget-friendly options are available without sacrificing quality. Look for paints that are well-reviewed and reputable brands but within a price scope that fits your budget. When choosing paint, consider the durability, drying time, and overall quality of the product. Compare prices and reviews across varied stores to find the optimal options that align with your project’s specifications.
Advanced Painting Techniques
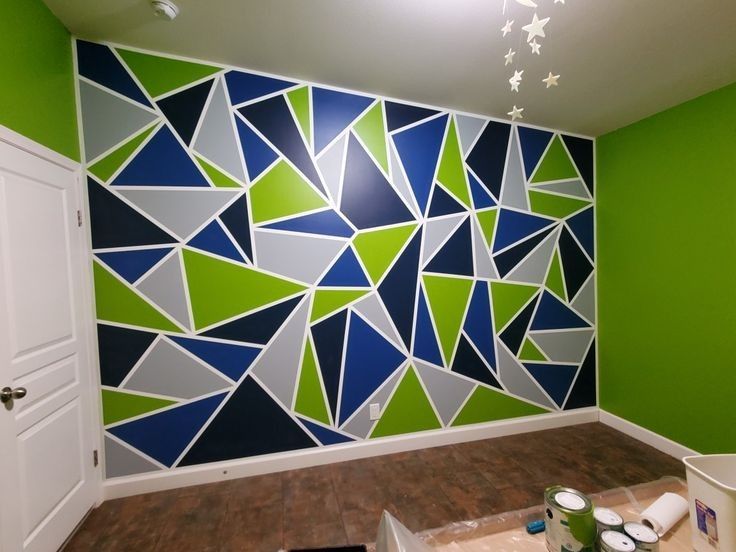
Textured Walls
Experimenting with textured walls involves creating unique effects, from faux finishes to decorative techniques. select textures and techniques that suit your vision and style for a captivating wall finish. Be sure to study the particular techniques involved in creating specific effects and how each may influence your final outcome.
Special Effects Painting
Explore unique special effects to add a touch of artistry to your walls. This involves advanced techniques such as marbling, sponging, or stenciling to enhance the aesthetic appeal of your space. study these special effects to ensure they are well within your skill level.
Choosing the Right Color Palette
Consider your space’s interior design when choosing a color palette. The appropriate color palette can significantly impact the feel and style of the area. Consider the size of the room, the light in the room, and the existing furniture and decor. Using a color wheel can help to find complementary and analogous color palettes, which help maintain cohesion in the room.
In conclusion, DIY wall painting offers a fantastic avenue for creativity and home improvement. By following these steps and tips, you can achieve professional-looking outcomes without breaking the bank. Remember to prep your walls thoroughly, select quality paints and tools, and practice your techniques before tackling large projects. Now you’re equipped with the know-how to transform your space with stunning DIY wall art. Ready to unleash your inner artist? Start your DIY wall painting project today!