How to Install Hardwood Floors Like a Pro
Transforming your home with beautiful hardwood floors can elevate its aesthetic appeal and boost its value significantly. But the intricate process of installing hardwood floors can be intimidating, especially for beginners. This thorough guide will demystify the process, empowering you to install hardwood floors like a pro. We’ll explore essential steps, from crucial preparation to meticulous finishing, and offer actionable tips to ensure a flawless outcome. This detailed guide will walk you through each stage, ensuring you understand every step before you begin. We will cover everything from choosing the right hardwood flooring to maintaining it for years to come.
Understanding Your Hardwood Flooring Options
Deciding on the Right Hardwood Type
Before diving into installation, knowing the varied hardwood types and their characteristics is crucial. Hardwood flooring comes in various species, each with unique qualities regarding durability, aesthetic appeal, and maintenance requirements. Consider factors like your budget, desired aesthetic, and the level of traffic your floors will experience. For example, oak is a popular choice known for its strength and versatility, while maple offers a classic look and easy maintenance. Choosing the right type can impact the overall achievement and longevity of your project. Some species can also have a higher cost, affecting the budget.
Choosing the Right Installation Method
Various installation methods exist, each with distinct benefits and drawbacks. Floating floors are a popular choice for DIY enthusiasts, offering ease of installation, but potentially creating gaps over time. Solid hardwood floors, on the other hand, offer a more traditional look and unparalleled durability, however, they can be more complex to install. Engineered hardwood, a popular alternative, combines the beauty of hardwood with the durability and ease of installation. Understanding the pros and cons of each method will help you make an informed decision based on your specific needs and preferences. Consider what type of look you want, and the amount of time you have to finish the job.
Preparing Your Subfloor for Installation
Ensuring a Level and Stable Base
Preparing the subfloor is paramount for a achievementful hardwood floor installation. An uneven or unstable subfloor can lead to squeaking, gaps, and potential damage over time. The subfloor should be perfectly level. Use shims to address uneven areas, ensuring a consistent height across the entire floor. This initial step lays the foundation for a strong and stable finished product. Addressing imperfections proactively can prevent costly repairs down the line, ensuring a smooth and satisfying project. Professional flooring installers use precise leveling tools, but homeowners can invest in a good level and shims for effective outcomes.
Installing the Hardwood Flooring
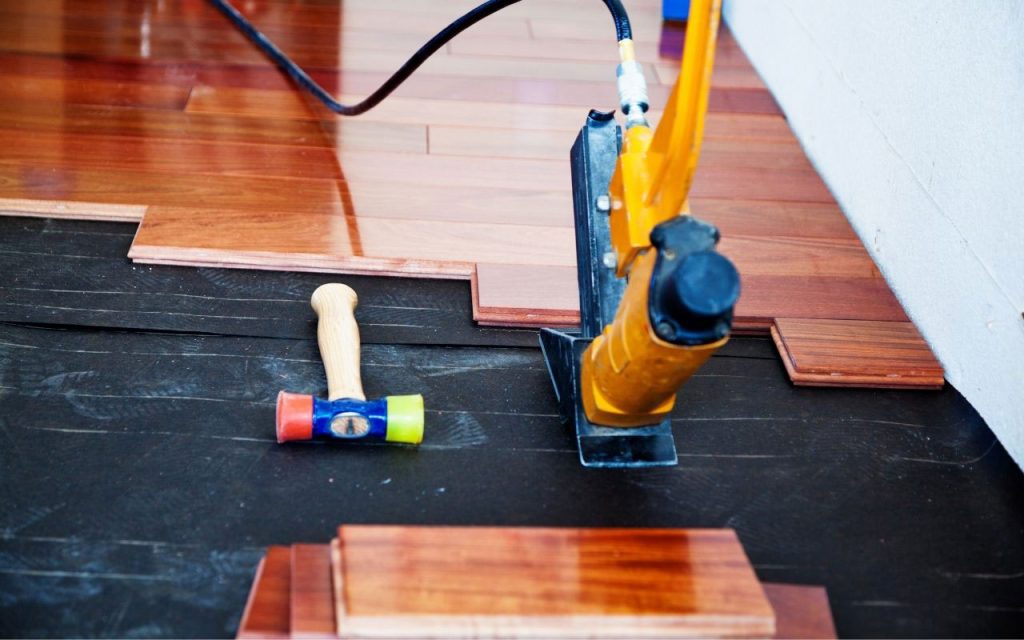
Correctly Laying the Plank
Installing the hardwood planks requires precision and care. Begin by carefully measuring and cutting the planks to fit the space. Ensure proper gaps between planks are maintained. Use appropriate adhesive and fasteners to secure the planks. These details are crucial to achieving a seamless and professional-looking installation. Consider using a hardwood installer’s guide for specific instructions, especially for complex layouts or unique flooring needs. varied types of hardwood will require varied installation methods.
Finishing Touches and Maintenance
Securing the Perimeter and Joints
Securing the perimeter and joints is a critical step. Use appropriate trim and molding to create a seamless transition between the hardwood floors and surrounding walls or other flooring elements. This step ensures a clean, finished look and protects the edges of the flooring. Take your time to ensure everything is even and secure, providing a lasting aesthetic.
Maintaining Your Hardwood Investment
Maintaining your hardwood floors is essential for longevity. Regular cleaning and protective treatments are vital to maintain the beauty and functionality of your new floors. Use appropriate cleaning products to prevent damage, and consider protective sealants or waxes to enhance the floors’ resistance to scratches and stains. A well-maintained hardwood floor can endure for decades, providing long-term value and enjoyment.
Troubleshooting Common Issues
Addressing Gaps and Uneven Surfaces
Troubleshooting any gaps, or uneven surfaces in your hardwood flooring during and after installation is crucial. Assess the cause of the problem, whether it be improper subfloor preparation or inadequate installation. Repairing minor issues promptly prevents larger problems from developing. Consider hiring a professional for issues outside your expertise. This is a vital step to ensuring you get a flawless finished product.
In conclusion, installing hardwood floors like a pro involves meticulous planning, precise execution, and a keen eye for detail. By following these steps, you can achieve a stunning, durable, and long-lasting floor that enhances your home’s aesthetic and value. If you feel overwhelmed or unsure about any stage, consider hiring a professional hardwood floor installer. They possess the expertise and tools to handle the project efficiently and ensure exceptional outcomes. Ready to transform your home with beautiful hardwood? Start your project today!