DIY flooring installation is a rewarding home improvement project that can save you significant money. Imagine walking into a newly renovated room, feeling the warmth of a freshly installed hardwood floor under your feet, knowing you did it yourself. This thorough guide walks you through the entire process, from preparation to finishing touches, empowering you to tackle this project with confidence. This guide identifies common challenges faced by DIYers and offers practical solutions for achieving a flawless installation. We will explore the varied types of flooring, discuss essential tools and materials, and offer a clear, detailed step-by-step process. This article is designed to be your ultimate resource for effectively completing a DIY flooring installation, regardless of your experience level. It includes essential preparation steps, material selection, installation techniques, and troubleshooting tips.
Planning and Preparation: Laying the Foundation for achievement
Assessing Your Needs and selecting the Right Flooring
Choosing the right flooring is crucial. Consider factors like your budget, desired aesthetic, and the room’s specific needs. Popular choices include hardwood, laminate, vinyl, tile, and carpet. study varied types of flooring to discover which material optimal fits your style, budget, and lifestyle. Don’t forget to factor in the cost of materials, tools, and any necessary underlayment or additional supplies. Consult with local stores to get quotes or contact online retailers for discounts. The right preparation is essential for a smooth installation. It ensures the new flooring will last for years to come. Understanding local building codes is also crucial when installing flooring in a house. Always double-check the requirements in your area.
Preparing the Subfloor
This is critical for a stable and lasting installation. Inspect the subfloor thoroughly for any damage, unevenness, or moisture issues. Repair any cracks or gaps, ensure it’s level, and address any moisture problems that may exist. Moisture is the enemy of flooring, causing warping and decay over time. Leveling the subfloor is a crucial step. Use shims to ensure an even surface for the new flooring. If your subfloor has serious damage, consider contacting a professional to assess the situation. Improper subfloor preparation can lead to a host of issues like warping, bubbling, or uneven surfaces after installation.
Material selection and Procurement: Gathering the Essentials
Choosing the Right Flooring Materials
select flooring materials carefully, considering factors such as durability, aesthetic appeal, and budget. Compare varied types of flooring based on your needs. Understand the specific requirements for your chosen material, like wood or laminate flooring. Proper material selection ensures a seamless and attractive final outcome. Remember to account for waste when purchasing materials, as cutting and fitting inevitably outcome in some material loss. Use online resources and store displays to envision the end outcome. Consider the long-term value of the flooring.
Tools and Equipment Needed for a achievementful Installation
Essential Tools for the Project
Gathering the right tools is paramount for a smooth and efficient installation. Essential tools for your project can scope from a simple tape measure to advanced tools needed for cutting and installation. Be sure you have the proper equipment and the necessary safety gear, like work gloves and eye protection. This ensures you have everything needed to complete the project safely and efficiently. Safety should always be your priority. Make sure all electrical work is completely shut off before starting the installation. Check the warranty of your tools and replace them if they are no longer functioning correctly. This will help reduce downtime in the middle of the project.
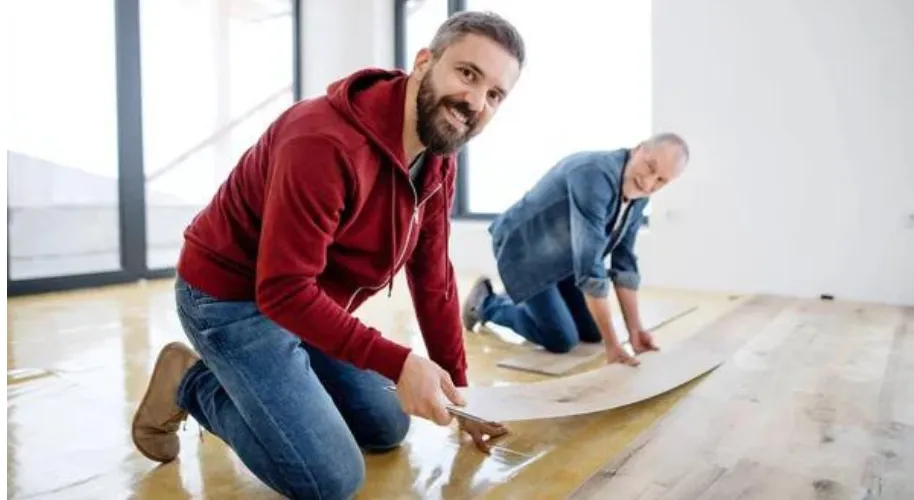
Installation Process: From Start to Finish
Step-by-Step Instructions for a Smooth Installation
A detailed step-by-step guide ensures a smooth installation process, regardless of the type of flooring. Carefully follow instructions, and take your time. This prevents mistakes and ensures a professional-looking finished product. Thoroughly inspect all materials before installation. If you encounter any problems during the installation, take a moment to reflect and determine the root cause. Contacting a professional is an option if you face serious challenges. This step-by-step guide clarifies each stage of the project. Proper installation avoids costly rework or repairs in the future.
Finishing Touches and Quality Control
Finishing Steps for a Polished Look
Thoroughly inspect the completed flooring. Check for any imperfections, gaps, or unevenness. Addressing these issues ensures you get the optimal possible outcomes. Quality control procedures should be followed meticulously. The final product should align with your vision for the space. Clean the new flooring following the manufacturer’s instructions.
Q2: How much will DIY flooring installation cost, and what are some budget-friendly options?
DIY flooring installation costs vary greatly depending on the type of flooring, the size of the area being installed, and your own experience. If you are skilled and have the right tools, this can save you a substantial amount compared to hiring a professional. Budget-friendly options include laminate flooring, vinyl plank flooring, or cheaper types of hardwood. Carefully compare the cost of materials, tools, and any necessary underlayment or additional supplies before starting the installation. studying pricing online can help you get an idea of the overall cost and determine potential cost-saving options.
Q3: How can I troubleshoot common problems during DIY flooring installation?
Troubleshooting common problems during DIY flooring installation can save you time and frustration. If you encounter issues like gaps or mismatched tiles, take a step back and carefully review the installation process to find where you might have gone wrong. This will save you time and potential costs in the long run.
Q4: What safety measures should I take during DIY flooring installation?
Safety is paramount throughout the installation process. Wear appropriate safety gear, such as work gloves and eye protection. Proper ventilation, especially when using adhesives or sealants, is critical. Inspecting your tools before use and ensuring they’re in good working order can also help prevent injuries.
string
In conclusion, DIY flooring installation can save you money and offer a satisfying sense of accomplishment. By following these steps and taking your time, you can transform your space with beautiful, personalized flooring. Remember to always prioritize safety and proper preparation. Consider hiring a professional if you lack experience or confidence in certain facets. Happy flooring! With a little planning and effort, you can tackle this home improvement project confidently. Visit our website for more home improvement guides or leave a comment below for any queries.